目录
Grid
StackPanel
WrapPanel
DockPanel
UniformGrid
Canvas&InkCanvas
Canvas
InkCanvas
Border
Grid
属性
ShowGridLines:显示边线
ColumnDefinitions 列集合 表示有几列下面就写几个ColumnDefinition
Width 宽:如果写具体数字则表示具体的宽度
没有写具体的值的话 剩余宽度平均分配 会根据屏幕的大小自动分配
* 代表比例
auto 代表自动填充最大宽度
RowDefinitions 行集合 表示有几行下面就写几个RowDefinition
Height 高:如果写具体数字则表示具体的高度
没有写具体的值的话 剩余高度平均分配 会根据屏幕的大小自动分配
* 代表比列
auto 代表自动填充最大宽度
Grid.IsSharedSizeScope="True" 共享列宽
需要在最外层Grid打开这个设置,然后在下面需要共享列宽的列设置:SharedSizeGroup="A"
Group一样的共享。
在Grid中,其他的控件想要放几行几列 需要另外设置:
Grid.Column = "几列" Grid.Row="几行" 没有设置默认 0列 0行
合并单元格
Grid.ColumnSpan = "合并几行" Grid.RowSpan="合并几列"
这里不是指定哪一列,而是指定合并多少列
Grid使用技巧:
- Grid中可以嵌套Grid。
- 当Windwo下面只能有一个控件的时候Grid是最好的控件。
- 任何布局只要使用恰当,都可以用Grid布局出来。
<Grid Grid.IsSharedSizeScope="True">
    <Grid ShowGridLines="True" Visibility="Hidden">
        <Grid.ColumnDefinitions>
            <ColumnDefinition Width="100"/>
            <ColumnDefinition Width="auto"/>
            <ColumnDefinition />
            <ColumnDefinition />
        </Grid.ColumnDefinitions>
        <Grid.RowDefinitions>
            <RowDefinition Height="100"/>
            <RowDefinition />
            <RowDefinition />
            <RowDefinition />
            <RowDefinition />
        </Grid.RowDefinitions>

        <Grid ShowGridLines="True" Grid.Row="2" Grid.Column="1" />

        <Button Grid.Column="2" Grid.Row="2" Grid.ColumnSpan="2"  Grid.RowSpan="2"/>
    </Grid>

    <Grid Height="30" ShowGridLines="True" VerticalAlignment="Top">
        <Grid.ColumnDefinitions>
            <ColumnDefinition SharedSizeGroup="A" Width="100"/>
            <ColumnDefinition />
            <ColumnDefinition />
            <ColumnDefinition />
        </Grid.ColumnDefinitions>
        <GridSplitter HorizontalAlignment="Right" Width="5" Background="Red"/>
    </Grid>

    <Grid Height="200" ShowGridLines="True" VerticalAlignment="Bottom">
        <Grid.ColumnDefinitions>
            <ColumnDefinition SharedSizeGroup="A"/>
            <ColumnDefinition />
            <ColumnDefinition />
            <ColumnDefinition />
        </Grid.ColumnDefinitions>
    </Grid>
</Grid>
StackPanel
默认 从下往往压榨的模式
属性
Orientation 改变压榨方向 如果内容有固定大小,就大小撑开,如果没有固定大小,就根据内容撑开
FlowDirection 读写习惯 左向右 或右向左
使用场景:图文并显、工具栏
可以用Grid代替
<StackPanel Orientation="Horizontal" FlowDirection="RightToLeft">
    <Button Content="Button1" />
    <Button Content="Button2" />
    <Button Content="Button3" />
</StackPanel>
WrapPanel
唯一一个不可以被Grid替代的布局控件,水平方向排列,过程中当前子项出界了,进行换行。
属性
Orientation 调整排列方向 默认值为水平方向
如果是水平排列 最大高度为所在行的最大高度为定
如果是垂直排列 最大宽度为所在行的最大宽度为定
使用场景:电脑桌面式图标排列、浏览器搜索历史关键词排列信息
<WrapPanel Orientation="Horizontal">
    <Button Content="Button1" Width="100" Height="30" />
    <Button Content="Button1" Width="100" Height="30" />
    <Button Content="Button1" Width="100" Height="30" Margin="10" />
    <Button Content="Button1" Width="100" Height="30" />
    <Button Content="Button1" Width="100" Height="30" />
    <Button Content="Button1" Width="100" Height="40" />
    <Button Content="Button1" Width="100" Height="30" />
    <Button Content="Button1" Width="200" Height="30" />
</WrapPanel>
DockPanel
停靠控件
属性
LastChildFill 最后一个孩子 是否填充
DockPanel.Dock 附加给子项控件使用 设置Dock属性 上下左右 停靠在哪里
注意:先写显示哪个子项的,先占有位置,第二个只能在空余位置中设置
使用场景:应用的主窗口布局(标题栏 状态栏 工具栏 菜单栏)
<DockPanel LastChildFill="False">
    <Button Content="Button1" Width="100" DockPanel.Dock="Bottom"/>
    <Button Content="Button3" DockPanel.Dock="Top"/>
    <Button Content="Button2" DockPanel.Dock="Left"/>
    <Button Content="Button4" Width="200" />
</DockPanel>
UniformGrid
均分 1*1 2*2 3*3 均分 等比分
属性
Columns 一共最多多少列 不存在指定列宽
Rows 一共最多多少行 不存在指定列高
如果只设置列 则内容行均分
如果只设置行 则内容列均分
如果行列都设置 则内容超出界面显示区域 但是也绘制
使用场景:9宫格的功能区域、图表(柱状图)
<UniformGrid Columns="3" Rows="3" Visibility="Collapsed">
    <Button Content="Button1"/>
    <Button Content="Button2"/>
    <Button Content="Button3"/>
    <Button Content="Button4"/>
    <Button Content="Button5"/>
    <Button Content="Button6"/>
    <Button Content="Button7"/>
    <Button Content="Button8"/>
    <Button Content="Button9"/>
</UniformGrid>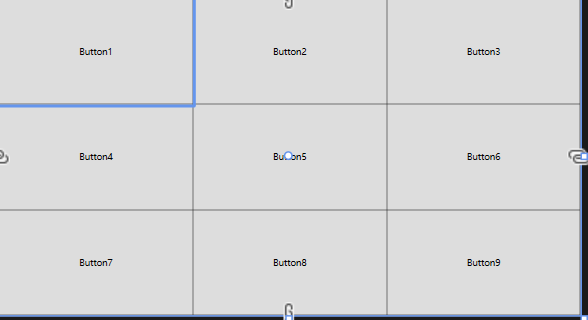
<UniformGrid Rows="1">
    <StackPanel Orientation="Vertical" VerticalAlignment="Bottom">
        <Border Height="150" Width="10" Background="Gray" VerticalAlignment="Bottom"/>
        <Border Height="100" Width="10" Background="Orange" VerticalAlignment="Bottom"/>
    </StackPanel>
    <Border Height="150" Width="10" Background="Orange" VerticalAlignment="Bottom"/>
    <Border Height="120" Width="10" Background="Orange" VerticalAlignment="Bottom"/>
    <Border Height="100" Width="10" Background="Orange" VerticalAlignment="Bottom"/>
    <Border Height="100" Width="10" Background="Orange" VerticalAlignment="Bottom"/>
    <Border Height="200" Width="10" Background="Orange" VerticalAlignment="Bottom"/>
    <Border Height="100" Width="10" Background="Orange" VerticalAlignment="Bottom"/>
    <Border Height="100" Width="10" Background="Orange" VerticalAlignment="Bottom"/>
</UniformGrid>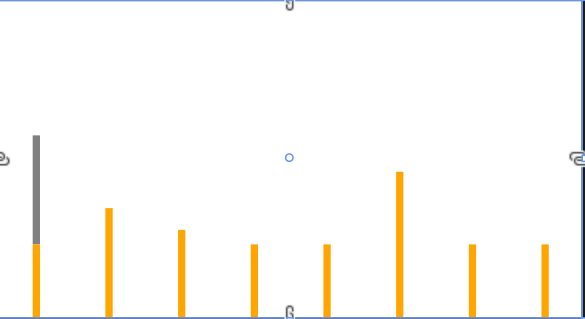
Canvas&InkCanvas
Canvas
默认子控件坐标对齐左上角
属性
Canvas.Left 左边多少距离
Canvas.Top 上方多少距离
Canvas.Right 右边多少距离
Canvas.Bottom 下方多少距离
可以用Margin代替
如果上下左右都设置 优先级 左>右 上>下
使用场景:组态、组件分装(仪表指针)
<Canvas>
<Button Content="Button1" Canvas.Left="100" Canvas.Top="20"/>
<Button Content="Button2" Canvas.Right="120" Canvas.Bottom="20"/>
<Button Content="Button2" Margin="10"/>
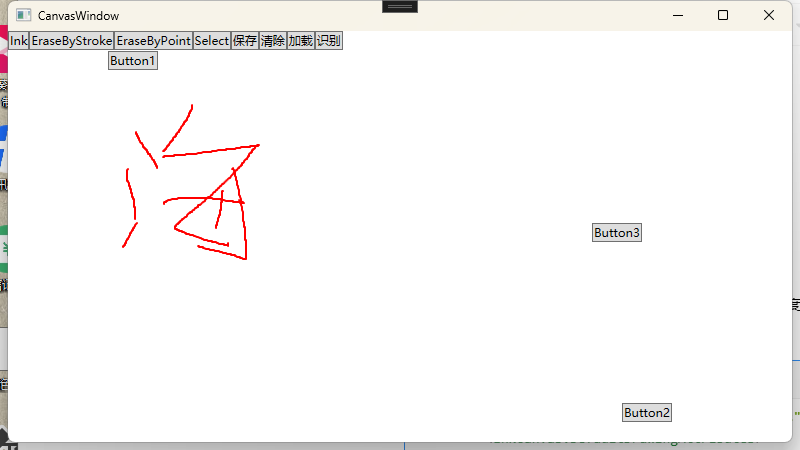
</Canvas>InkCanvas
笔迹 -- 可以当画板 获取笔迹
属性
EditingMode 编辑的模式
Ink 笔迹 画布 默认Ink
EraseByPoint 根据点删除
EraseByStroke 整条线删除
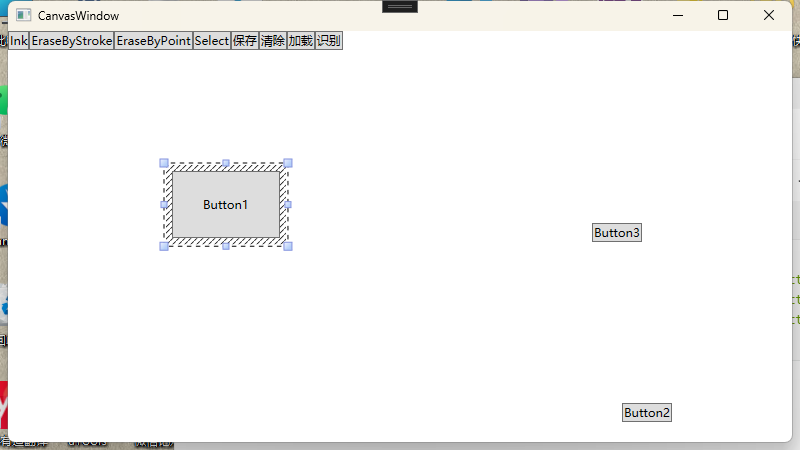
Select 选中 可以编辑
DefaultDrawingAttributes 设置线的颜色和宽度和高度
使用场景:画板、签字、电子黑板
<InkCanvas EditingMode="Ink" Name="inkCanvas">
    <InkCanvas.DefaultDrawingAttributes>
        <DrawingAttributes Color="Red" Width="2" Height="2"/>
    </InkCanvas.DefaultDrawingAttributes>
    <Button Content="Button1" InkCanvas.Left="100" InkCanvas.Top="20" Click="Button_Click"/>
    <Button Content="Button2" InkCanvas.Right="120" InkCanvas.Bottom="20" Click="Button_Click_1"/>
    <Button Content="Button3" InkCanvas.Right="150" InkCanvas.Bottom="200" Click="Button_Click_2"/>
</InkCanvas>
Ink模式:
Select模式:
保存笔迹的做法:
private void Button_Click_4(object sender, RoutedEventArgs e)
{
    // 笔迹保存
    using FileStream fileStream = new FileStream("test.sk",FileMode.OpenOrCreate,FileAccess.ReadWrite);
    this.inkCanvas.Strokes.Save(fileStream,true);
}
private void Button_Click_5(object sender, RoutedEventArgs e)
{
    // 清除
    this.inkCanvas.Strokes.Clear();
}
private void Button_Click_6(object sender, RoutedEventArgs e)
{
    // 加载
    using FileStream fileStream = new FileStream("test.sk", FileMode.Open, FileAccess.Read);
    this.inkCanvas.Strokes.Add(new System.Windows.Ink.StrokeCollection(fileStream));
}
手写识别案例:
Ink ink = new Ink();
private void Button_Click(object sender, RoutedEventArgs e)
{
    // 识别库
    using RecognizerContext recognizerContext = new RecognizerContext();

    recognizerContext.Strokes = ink.CreateStrokes();
    recognizerContext.Strokes.Add(CombineStrokr());

    RecognitionResult result = recognizerContext.Recognize(out RecognitionStatus status);
    RecognitionAlternates als = result.GetAlternatesFromSelection();

    List<string> strs = new List<string>();
    for (int i = 0; i < als.Count; i++)
    {
        strs.Add(als[i].ToString());
    }
}

// Strokr 合并
private Stroke CombineStrokr()
{
    List<System.Drawing.Point> points = new List<System.Drawing.Point>();
    foreach (var item in this.inkCanvas.Strokes)
    {
        // 将 StylusPoints 转换为 System.Drawing.Point
        points.AddRange(item.StylusPoints.Select(p => new System.Drawing.Point((int)p.X, (int)p.Y)).ToList());
    }

    return ink.CreateStroke(points.ToArray());
}
<!--手写文字识别Demo-->
<InkCanvas Name="inkCanvas" />
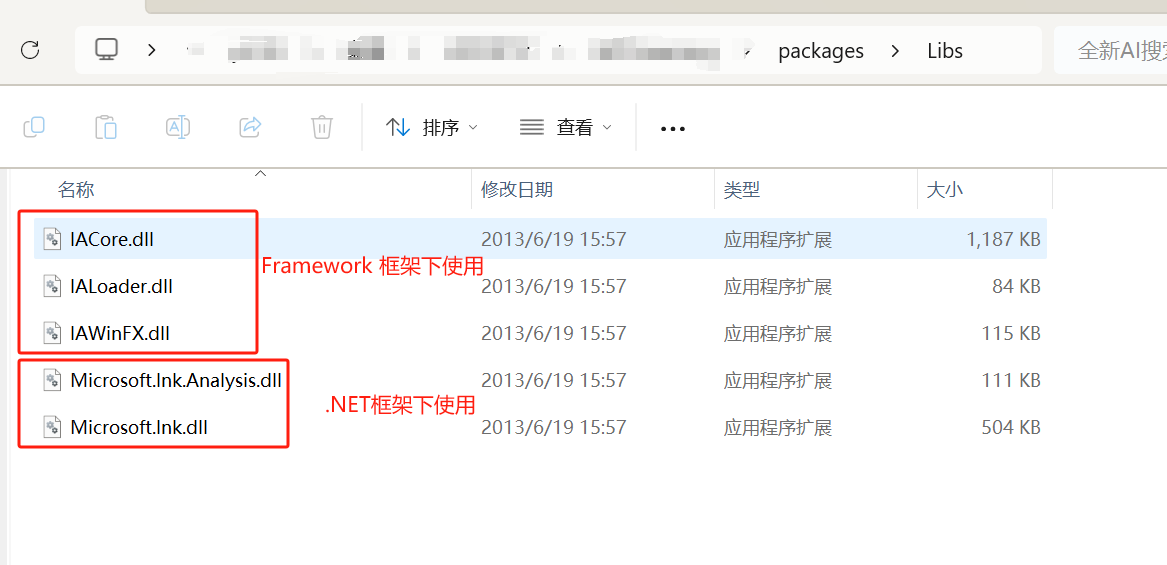
<Button Content="识别" Click="Button_Click" VerticalAlignment="Bottom"/>需要引用以下dll库: 可以在本合集置顶博客看我的代码路径,可以下载使用即可。
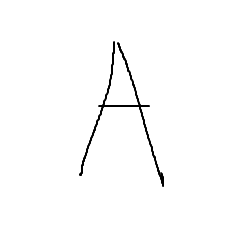
演示如下:
手写个A:
识别出来的为:
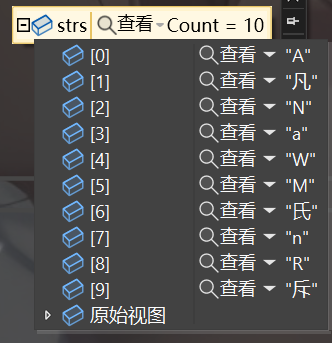

看代码反馈,也很难不看出,是NoError,证明识别成功。然后再strs中进行解析匹配像的值。
可以看出,识别效果还是很准确的,第一个就是想要的值。
微软官网也有Ink识别笔画和形状的案例:https://learn.microsoft.com/zh-cn/windows/apps/design/input/convert-ink-to-text
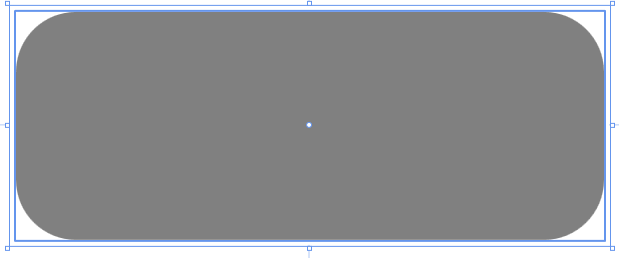
Border
装饰控件
Border内部只能放一个对象
使用场景:
需要背景的时候,或者需要特殊样式的时候
<Border CornerRadius="20"
        Width="200"
        Height="80"
        Background="Orange"
        BorderBrush="Red"
        BorderThickness="2">
    <Border.Clip>
        <RectangleGeometry RadiusX="20" RadiusY="20" Rect="2 2 196 76" />
    </Border.Clip>
    <Grid Background="Gray" />
</Border>